重点参考了sxjlinux的博客《idea使用Maven创建web服务,并搭建ssh框架使用tomcat运行》搭建,https://blog.csdn.net/sunxiaoju/article/details/81007709

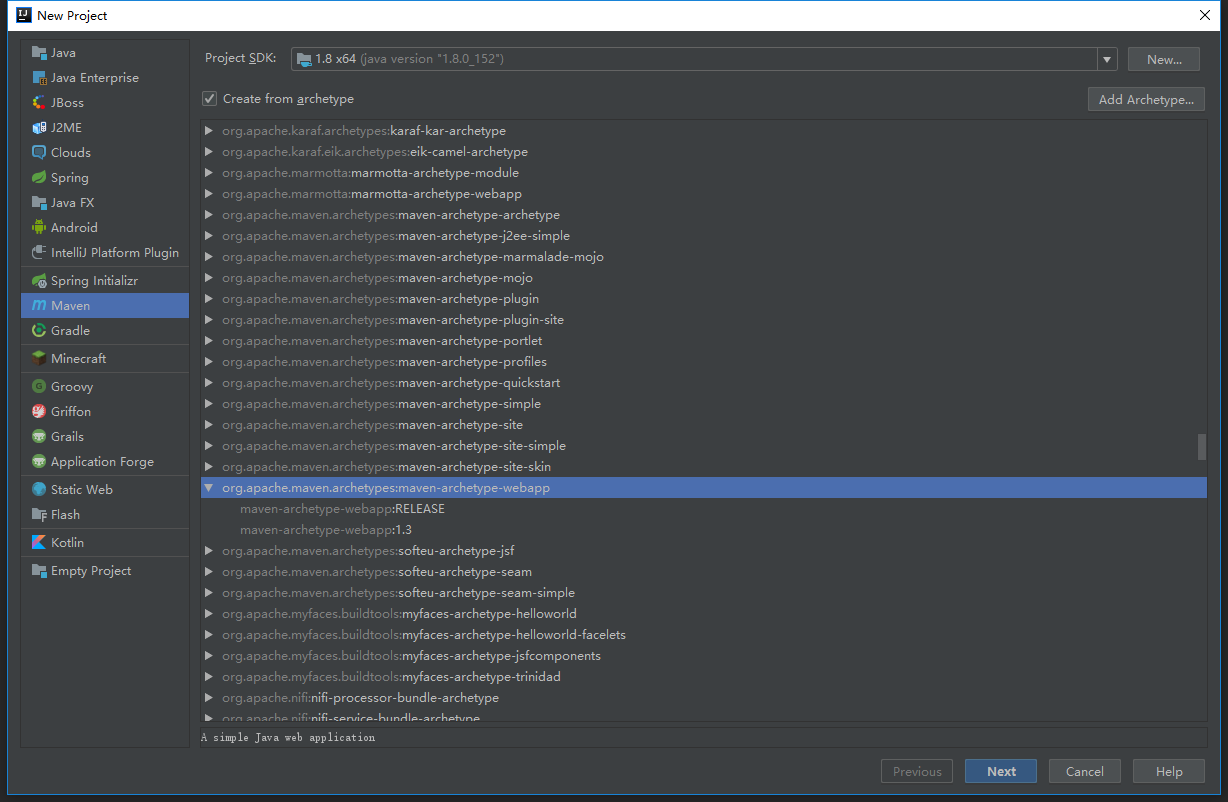
1.我们创建一个新的项目,选择Maven,并使用Maven搭建一个web的项目,如下图:

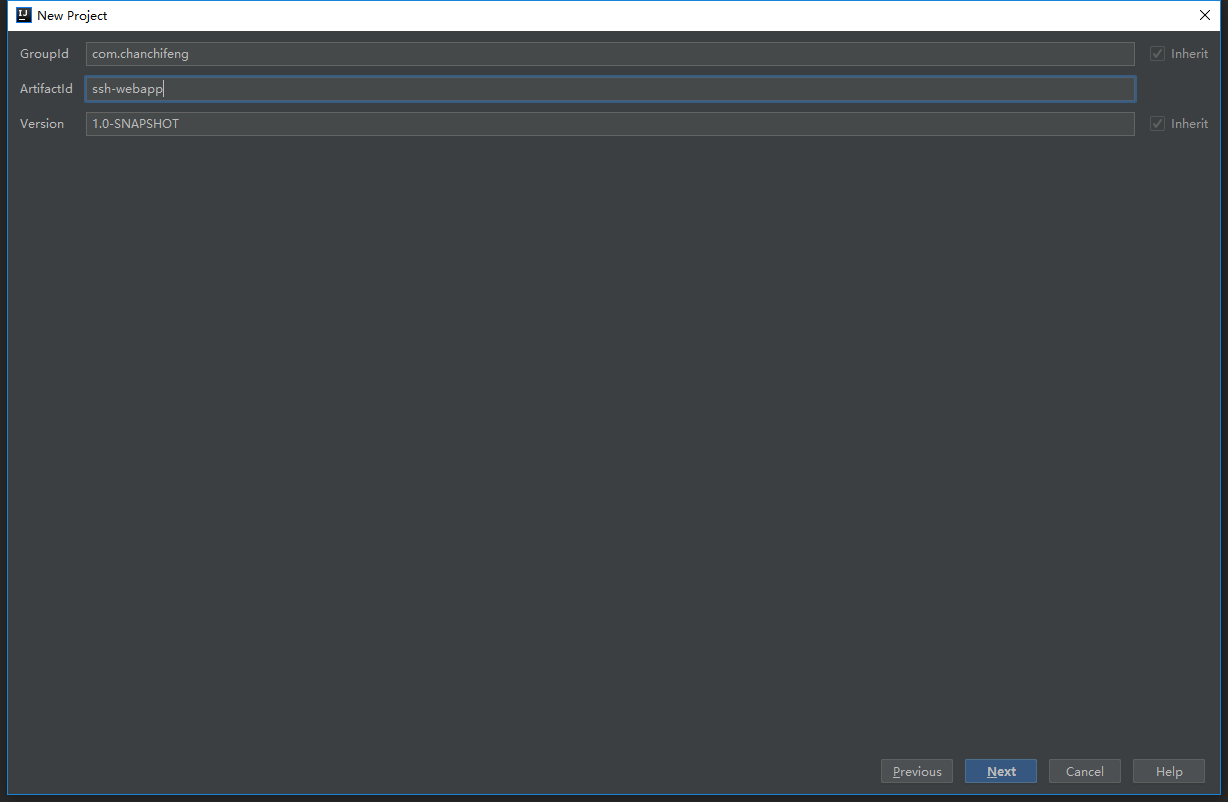
2.在GroupId填写com.chanchifeng,在ArtifactId填写ssh-webapp,如下图:

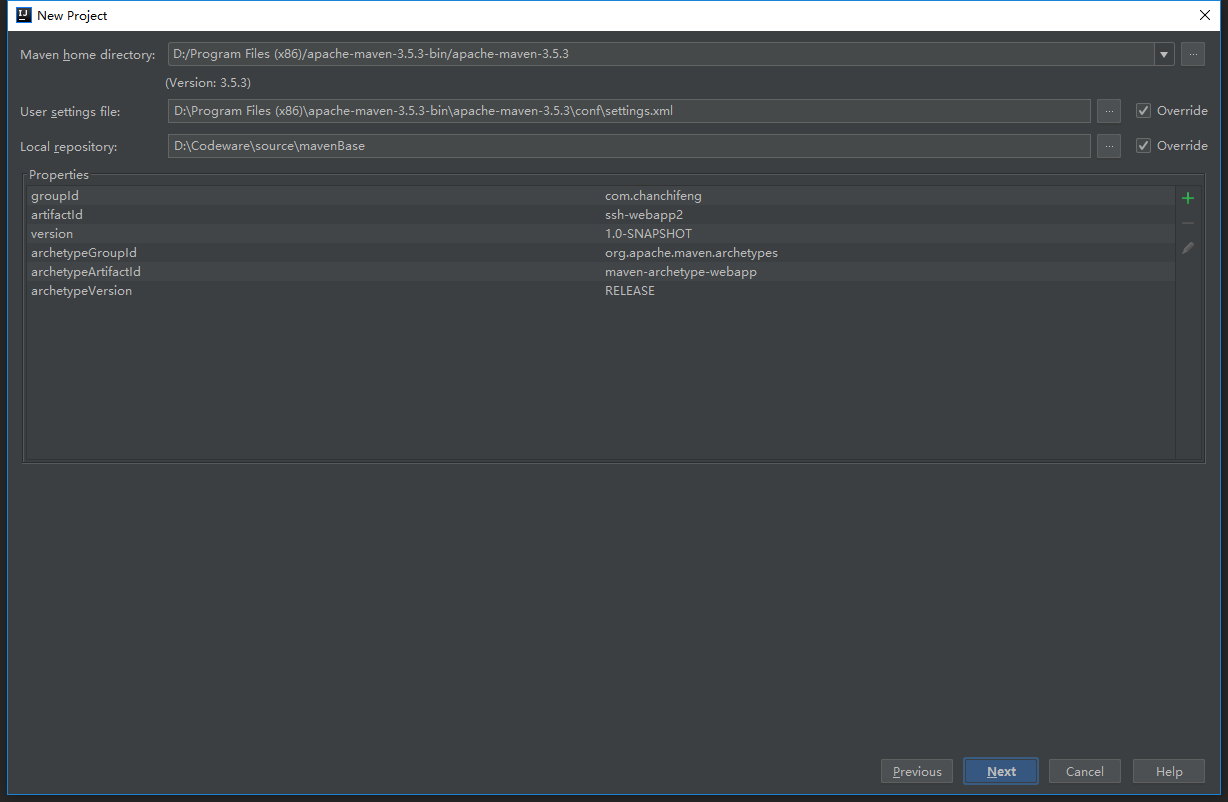
3.默认选择已经配置完成的idea中的maven,如下图:

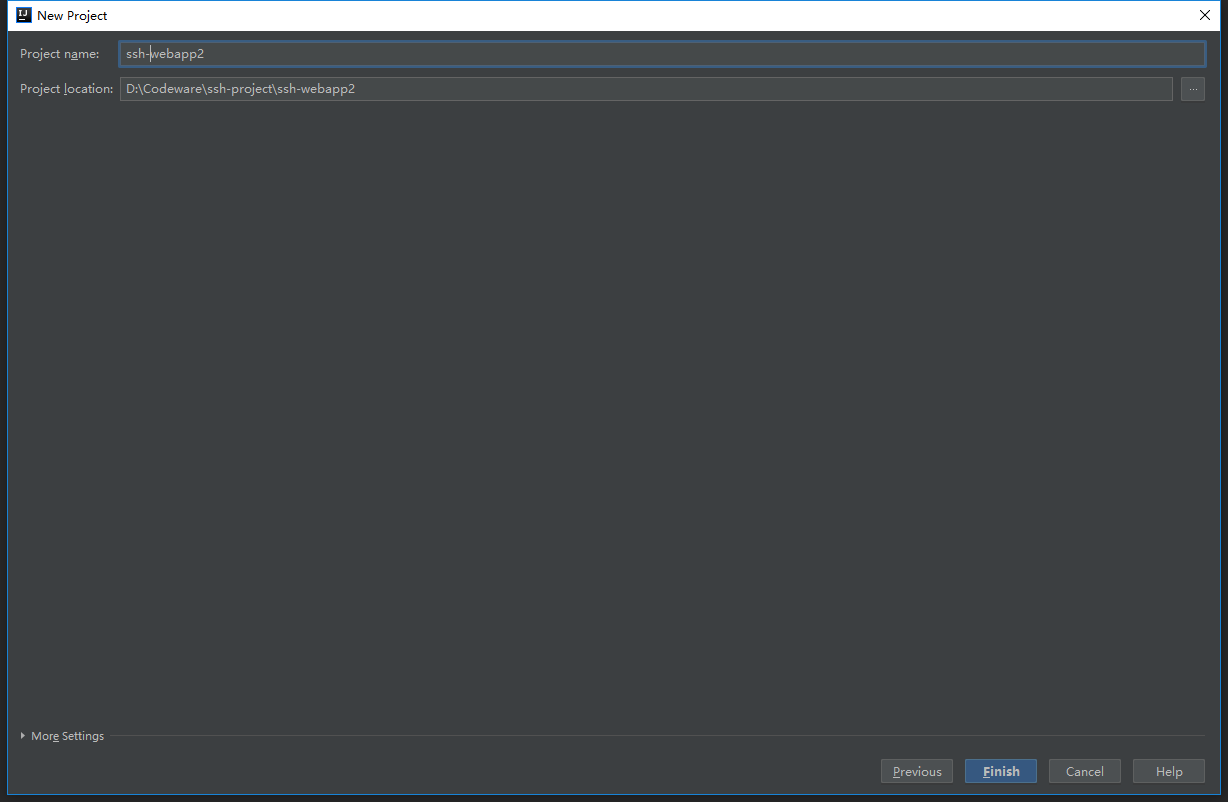
4.在Project name填写ssh-webapp2,选择适合的项目路径,如下图:

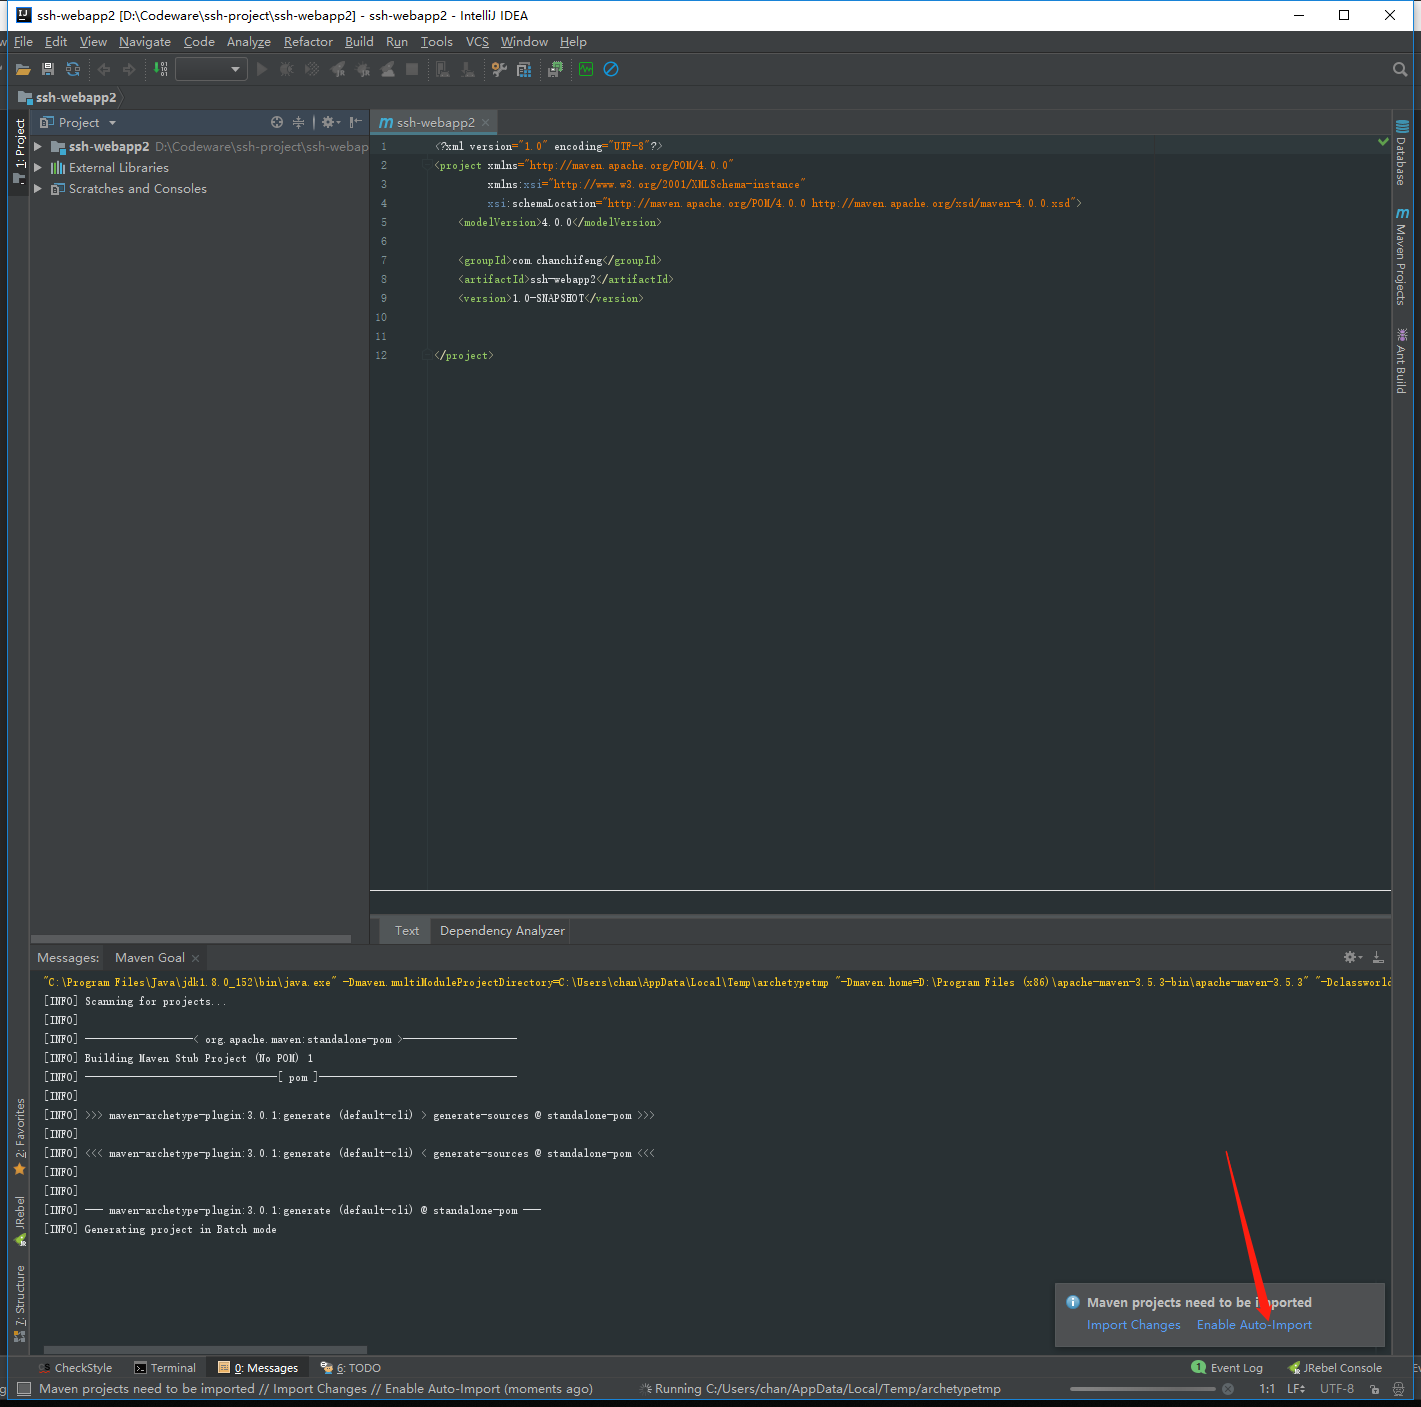
5.在使用Maven创建项目的时候,idea会提醒是否自动下载Maven中的依赖,点击Enable Auto-Import,如下图:

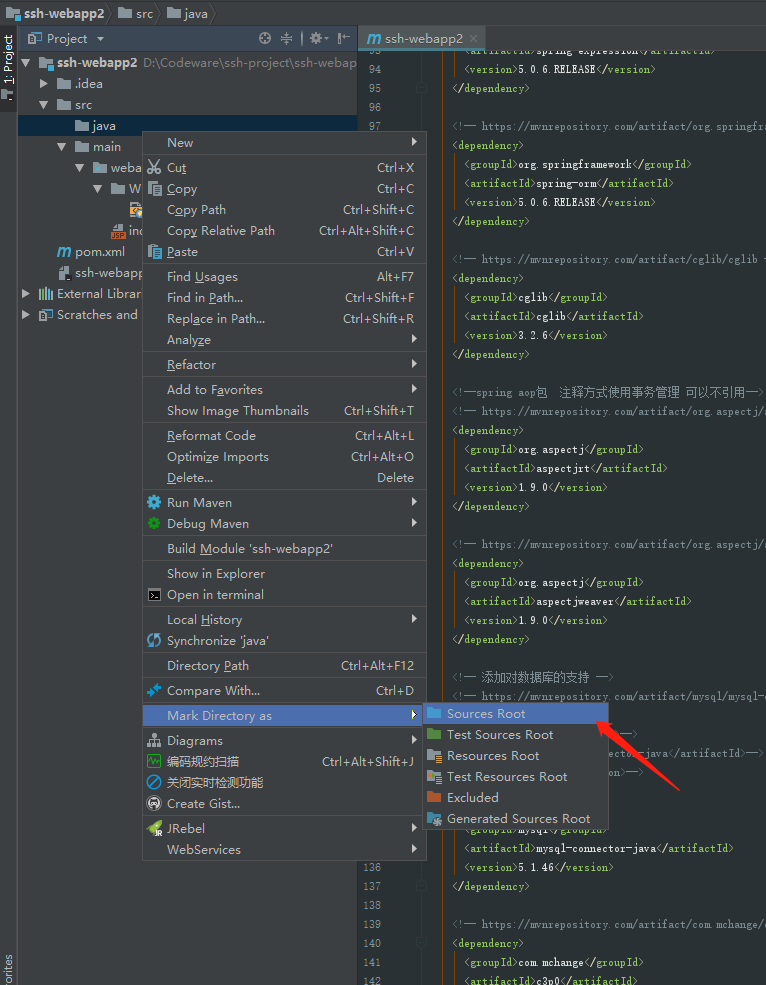
6.在src中,创建一个文件夹为java,并使文件夹为Sources Root 类型,如下图:

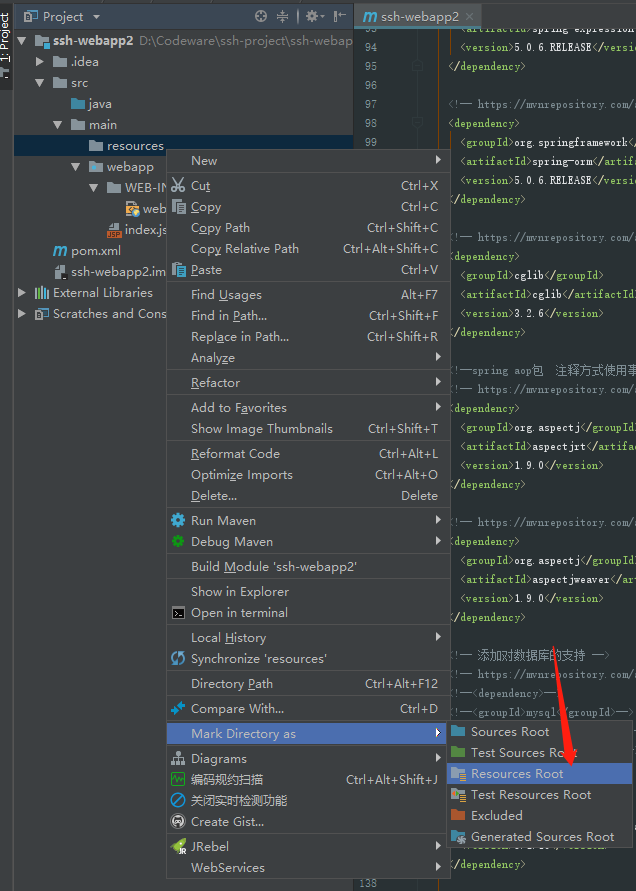
7.在main中,创建一个文件夹为resources,并使文件夹为Resources Root 类型,如下图:

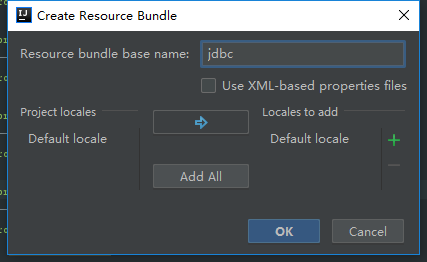
8.在resources中创建jdbc.properties,如下图:

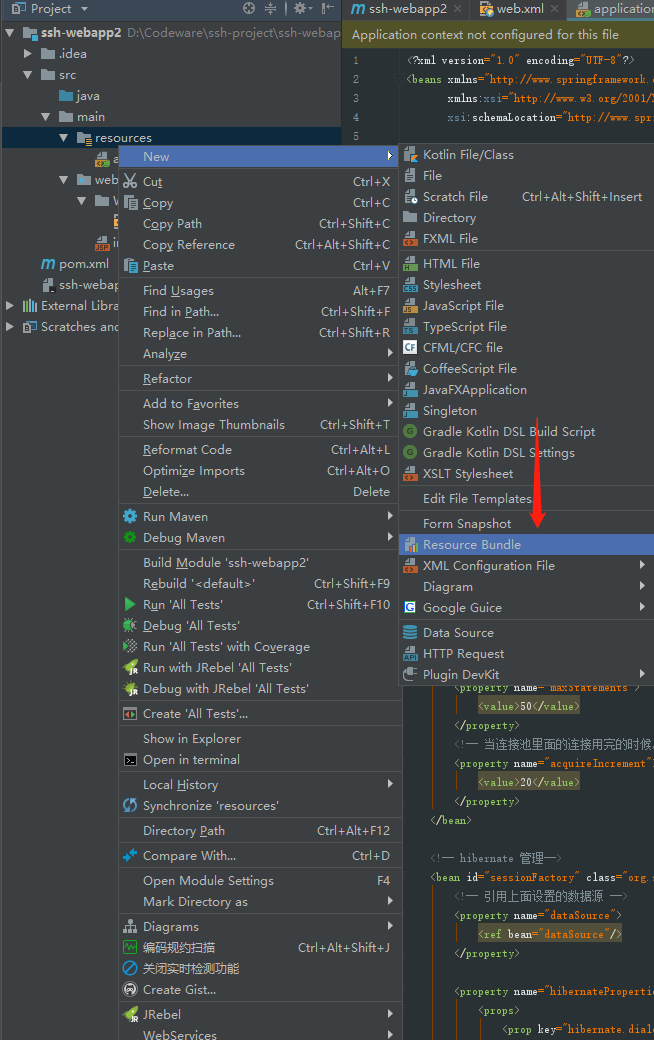
9.在resources中创建jdbc.properties,如下图:

10.在resource中创建applicationContext.xml,代码如下:

1
2
3
4
5
6
7
8
9
10
11
12
13
14
15
16
17
18
19
20
21
22
23
24
25
26
27
28
29
30
31
32
33
34
35
36
37
38
39
40
41
42
43
44
45
46
47
48
49
50
51
52
53
54
55
56
57
58
59
60
61
62
63
64
65
66
67
68
69
70
71
72
73
74
75
76
77
78
79
80
81
82
83
84
85
86
87
<?xml version="1.0" encoding="UTF-8"?>
<beans xmlns="http://www.springframework.org/schema/beans"
xmlns:xsi="http://www.w3.org/2001/XMLSchema-instance" xmlns:tx="http://www.springframework.org/schema/tx"
xmlns:context="http://www.springframework.org/schema/context"
xsi:schemaLocation="http://www.springframework.org/schema/beans http://www.springframework.org/schema/beans/spring-beans.xsd http://www.springframework.org/schema/tx http://www.springframework.org/schema/tx/spring-tx.xsd http://www.springframework.org/schema/context http://www.springframework.org/schema/context/spring-context.xsd">

<context:component-scan base-package="com.chanchifeng.action"></context:component-scan>
<context:component-scan base-package="com.chanchifeng.service"></context:component-scan>
<context:component-scan base-package="com.chanchifeng.dao"></context:component-scan>

<!--配置使springframwork引入jdbc.properties文件,然后就可以通过${mysql.driverClassName}来得到jdbc.properties文件中对应的值了-->
<bean id="propertyConfigurer" class="org.springframework.beans.factory.config.PropertyPlaceholderConfigurer">
<property name="location" value="classpath:jdbc.properties"/>
</bean>

<!-- 设置数据源连接字符串 -->
<bean id="dataSource" class="com.mchange.v2.c3p0.ComboPooledDataSource">
<property name="driverClass" value="${mysql.driverClassName}"></property>
<property name="jdbcUrl" value="${mysql.url}"></property>
<property name="user" value="${mysql.username}"></property>
<property name="password" value="${mysql.password}"></property>
<!-- 设置数据库连接池的最大连接数 -->
<property name="maxPoolSize">
<value>50</value>
</property>
<!-- 设置数据库连接池的最小连接数 -->
<property name="minPoolSize">
<value>5</value>
</property>
<!-- 设置数据库连接池的初始化连接数 -->
<property name="initialPoolSize">
<value>5</value>
</property>
<!-- 设置数据库连接池的连接最大空闲时间 -->
<property name="maxIdleTime">
<value>20</value>
</property>
<!-- c3p0缓存Statement的数量数 -->
<property name="maxStatements">
<value>50</value>
</property>
<!-- 当连接池里面的连接用完的时候,C3P0一下获取新的连接数 -->
<property name="acquireIncrement">
<value>20</value>
</property>
</bean>

<!-- hibernate 管理-->
<bean id="sessionFactory" class="org.springframework.orm.hibernate5.LocalSessionFactoryBean">
<!-- 引用上面设置的数据源 -->
<property name="dataSource">
<ref bean="dataSource"/>
</property>

<property name="hibernateProperties">
<props>
<prop key="hibernate.dialect">org.hibernate.dialect.MySQLDialect</prop>
<prop key="hibernate.autoReconnect">true</prop>
<prop key="hibernate.connection.autocommit">true</prop>
<prop key="hibernate.hbm2ddl.auto">update</prop>
<prop key="hibernate.show_sql">true</prop>
<prop key="hibernate.format_sql">true</prop>
<!-- 解决session关闭问题 -->
<prop key="hibernate.enable_lazy_load_no_trans">true</prop>
<!-- spring 和 hibernate 整合的时候默认就是使用线程的,下面这一行不用写,写了反而要报错,此外 sessionFaction,不能使用openSession
既不能保存数据到数据库,还不能实现事务功能
-->
<!--<prop key="current_session_context_class">thread</prop>-->

<prop key="hibernate.max_fetch_depth">3</prop>
<!--<prop key="hibernate.connection.url" >jdbc:mysql://localhost:3306/webapp</prop>-->
<prop key="hibernate.connection.url" >jdbc:mysql://localhost:3306/webapp</prop>
<!--<prop key="hibernate.connection.driver_class">com.mysql.jdbc.Driver</prop>-->
<prop key="hibernate.connection.driver_class">com.mysql.jdbc.Driver</prop>
</props>
</property>

</bean>

<!-- 用注解来实现事物管理 -->
<bean id="txManager" class="org.springframework.orm.hibernate5.HibernateTransactionManager">
<property name="sessionFactory" ref="sessionFactory"/>
</bean>

<tx:annotation-driven transaction-manager="txManager"/>

</beans>

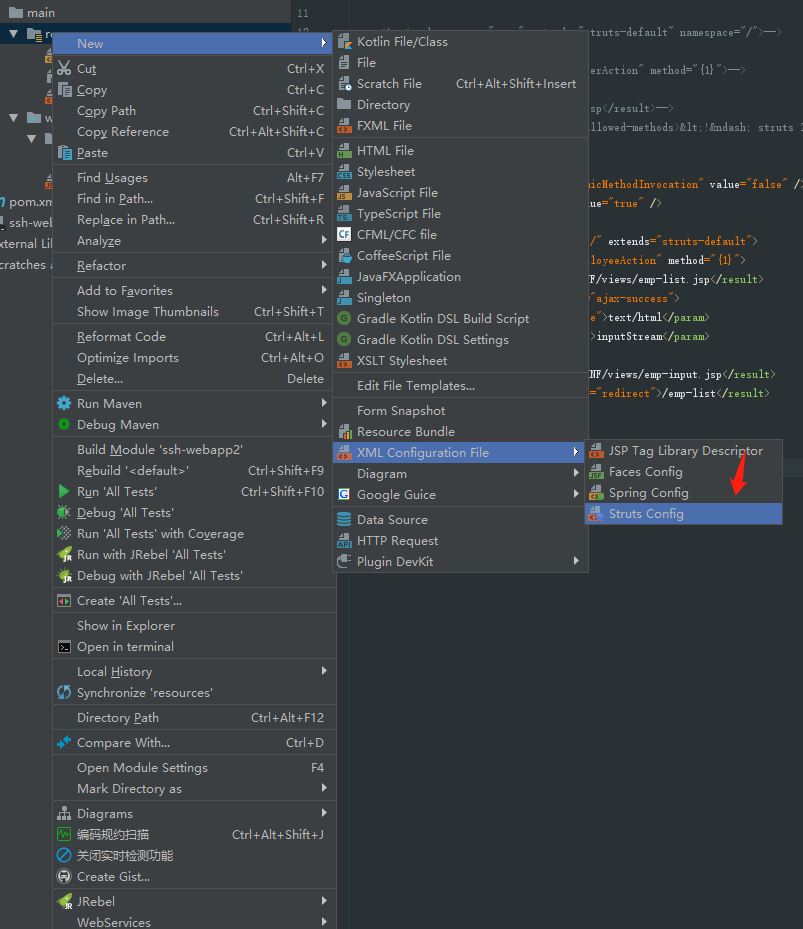
11.在resource中创建struts.xml,代码如下,如下图:

1
2
3
4
5
6
7
8
9
10
11
12
13
14
15
16
17
18
19
<?xml version="1.0" encoding="UTF-8"?>

<!DOCTYPE struts PUBLIC
"-//Apache Software Foundation//DTD Struts Configuration 2.5//EN"
"http://struts.apache.org/dtds/struts-2.5.dtd">

<struts>

<!-- 修改常量管理struts 中的action的工程,这个常量的使用,必须引入 spring和struts的整合包,不然spring无法管理struts2 Action 中的实体类-->
<constant name="struts.objectFactory" value="spring" />

<package name="employee" extends="struts-default" namespace="/">
<action name="employee_*" class="employeeAction" method="{1}">
<result name="success">/index.jsp</result>
<allowed-methods>m1,saveUser</allowed-methods><!-- struts 2.5 之后,使用通配符必须加上这一行 ,否则无法使用通配符访问-->
</action>
</package>

</struts>

12.在java中,创建com.chanchifeng.action.EmployeeAction的java文件,代码如下:

1
2
3
4
5
6
7
8
9
10
11
12
13
14
15
16
17
18
19
20
21
22
23
24
25
26
27
28
@Controller("employeeAction")
@Scope("prototype")
public class EmployeeAction extends ActionSupport {

private Employee employee;

@Resource
private EmployeeService employeeService;

public Employee getEmployee(){
return employee;
}

public String m1(){
System.out.println("in this");
employee = employeeService.getEmployee(1);
System.out.println(employee);
return SUCCESS;
}

public String saveEmployee(){
Employee employee = new Employee();
employee.setLastName("porschan");
employeeService.saveEmployee(employee);
return SUCCESS;
}

}

13.在java中,创建com.chanchifeng.dao.impl.EmployeeDaoImpl的java文件,代码如下:

1
2
3
4
5
6
7
8
9
10
11
12
13
14
15
16
17
18
19
@Repository("employeeDao")
public class EmployeeDaoImpl implements EmployeeDao {

@Resource(name="sessionFactory")
private SessionFactory sessionFactory;

@Override
public Employee getEmployee(Integer id) {
Session session=sessionFactory.getCurrentSession();
return session.get(Employee.class,id);
}

@Override
public void saveEmployee(Employee employee) {
Session session=sessionFactory.getCurrentSession();
session.save(employee);
System.out.println("======="+employee.getLastName());
}
}

14.在java中,创建com.chanchifeng.dao.EmployeeDao的java文件,代码如下:

1
2
3
4
5
6
7
8
9
10
11
12
13
14
15
16
17
public interface EmployeeDao {
/**
*
* 获取雇员信息
*
* @param id
* @return
*/
Employee getEmployee(Integer id);

/**
* 保存雇员信息
*
* @param employee
*/
void saveEmployee(Employee employee);
}

15.在java中,创建com.chanchifeng.model的包,代码如下:

16.在java中,创建com.chanchifeng.service.impl.EmployeeServiceImpl的java文件,代码如下:

1
2
3
4
5
6
7
8
9
10
11
12
13
14
15
16
17
18
19
@Service("employeeService")
public class EmployeeServiceImpl implements EmployeeService {

@Resource
private EmployeeDao employeeDao;

@Transactional(rollbackFor = {Exception.class,RuntimeException.class})
@Override
public Employee getEmployee(Integer id) {
return employeeDao.getEmployee(id);
}


@Transactional(rollbackFor = {Exception.class,RuntimeException.class})
@Override
public void saveEmployee(Employee employee) {
employeeDao.saveEmployee(employee);
}
}

17.在java中,创建com.chanchifeng.service.EmployeeService的java文件,代码如下:

1
2
3
4
public interface EmployeeService {
Employee getEmployee(Integer id);
void saveEmployee(Employee employee);
}

18.创建Mysql的数据库,代码如下:

1
2
3
4
5
6
7
8
9
10
11
12
13
14
15
16
17
18
19
20
21
CREATE DATABASE webapp;

DROP TABLE IF EXISTS `department`;
CREATE TABLE `department` (
`id` int(11) NOT NULL AUTO_INCREMENT,
`departmentName` varchar(255) CHARACTER SET utf8 COLLATE utf8_general_ci NULL DEFAULT NULL,
PRIMARY KEY (`id`) USING BTREE
)

DROP TABLE IF EXISTS `employee`;
CREATE TABLE `employee` (
`id` int(11) NOT NULL AUTO_INCREMENT,
`lastName` varchar(255) CHARACTER SET utf8 COLLATE utf8_general_ci NULL DEFAULT NULL,
`email` varchar(255) CHARACTER SET utf8 COLLATE utf8_general_ci NULL DEFAULT NULL,
`birth` timestamp(0) NULL DEFAULT NULL,
`createTime` timestamp(0) NULL DEFAULT NULL,
`department_id` int(11) NULL DEFAULT NULL,
PRIMARY KEY (`id`) USING BTREE,
INDEX `FKbejtwvg9bxus2mffsm3swj3u9`(`department_id`) USING BTREE,
CONSTRAINT `FKbejtwvg9bxus2mffsm3swj3u9` FOREIGN KEY (`department_id`) REFERENCES `department` (`id`) ON DELETE RESTRICT ON UPDATE RESTRICT
)

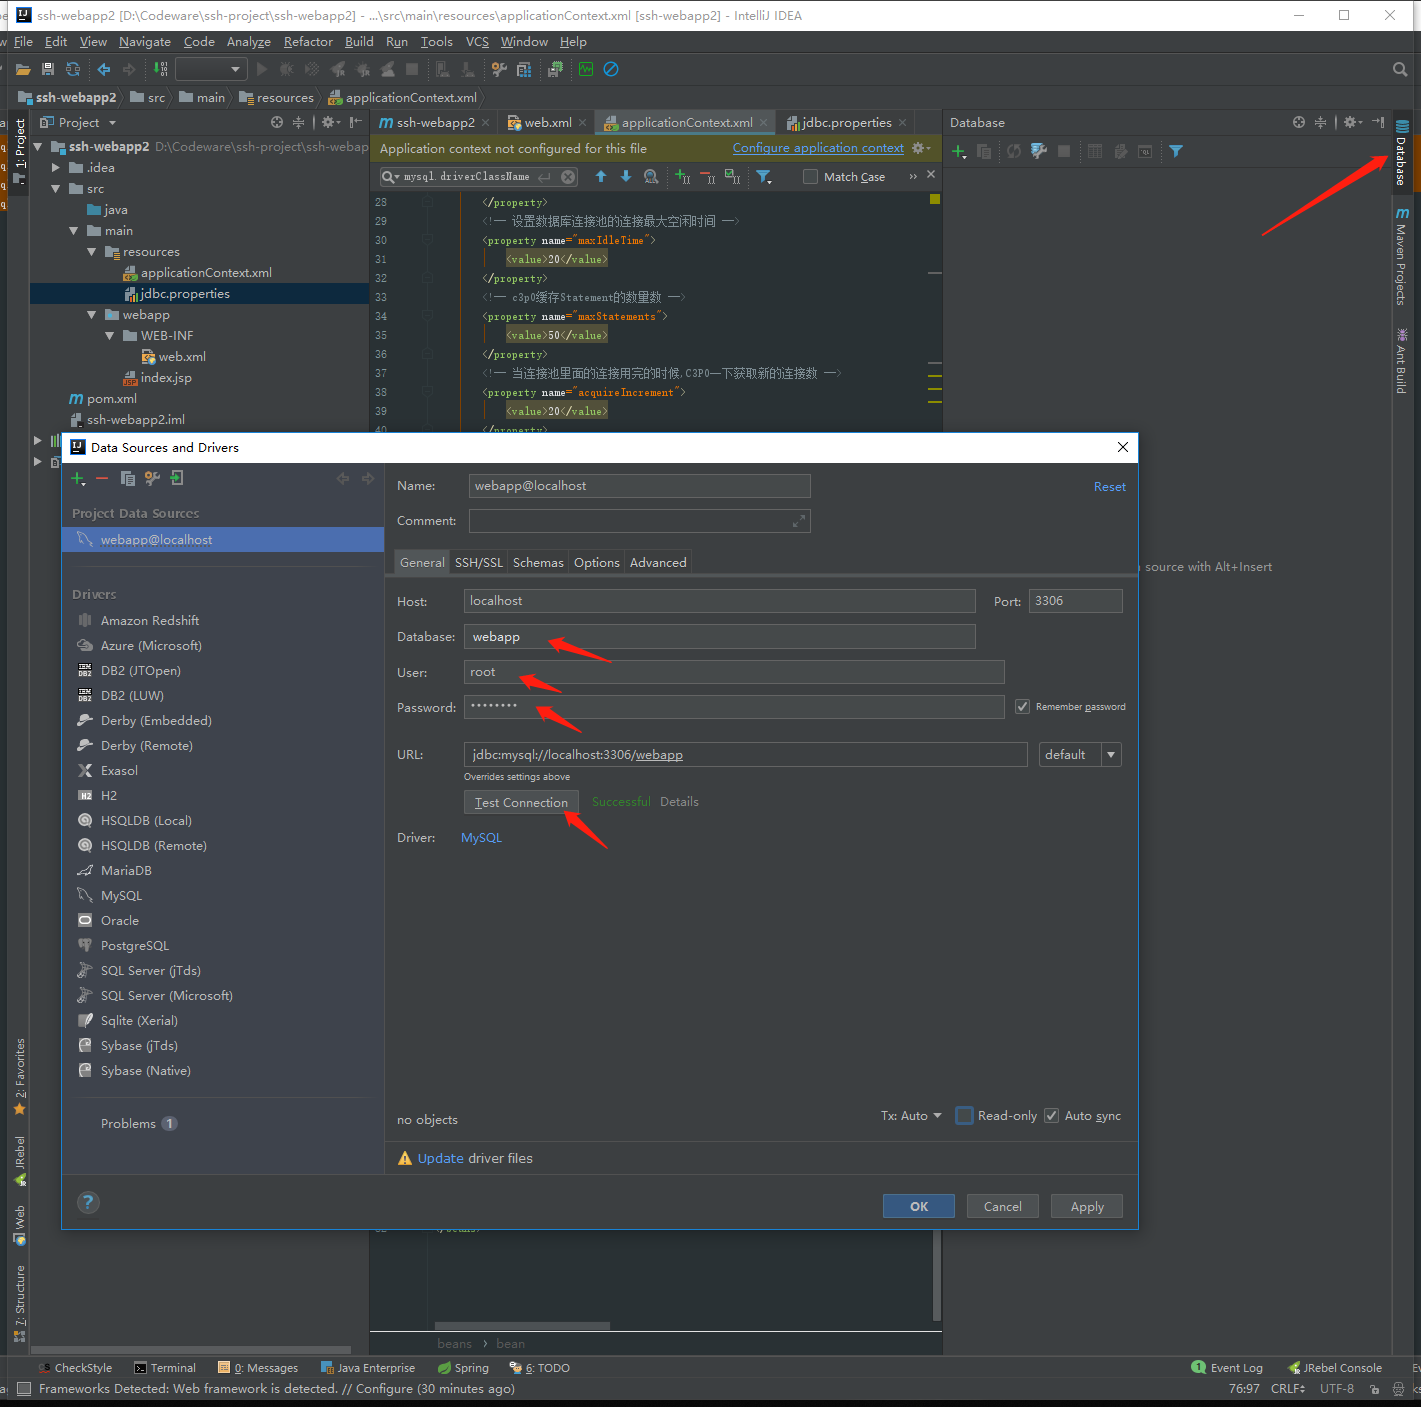
19.配置idea中的数据库信息,如下图:

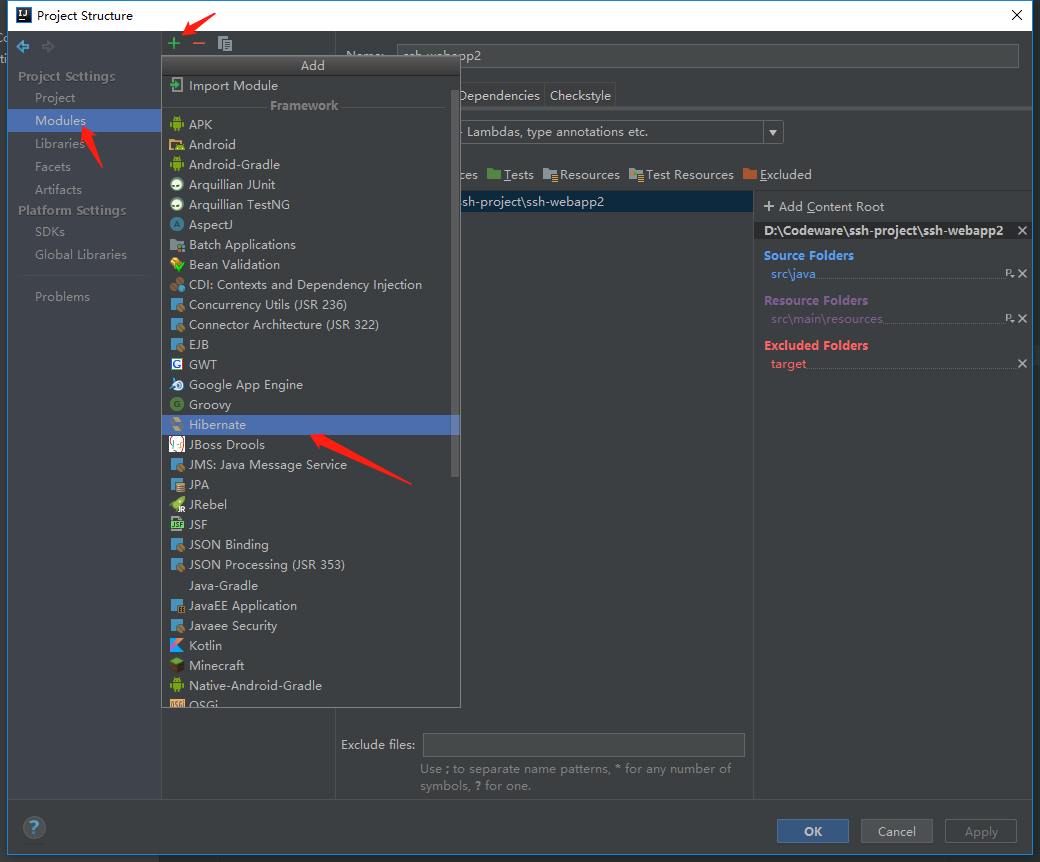
20.选择项目,点击键盘F4,弹出Project Structure,在Modules中,选择+,选择Hibernate,如下图:

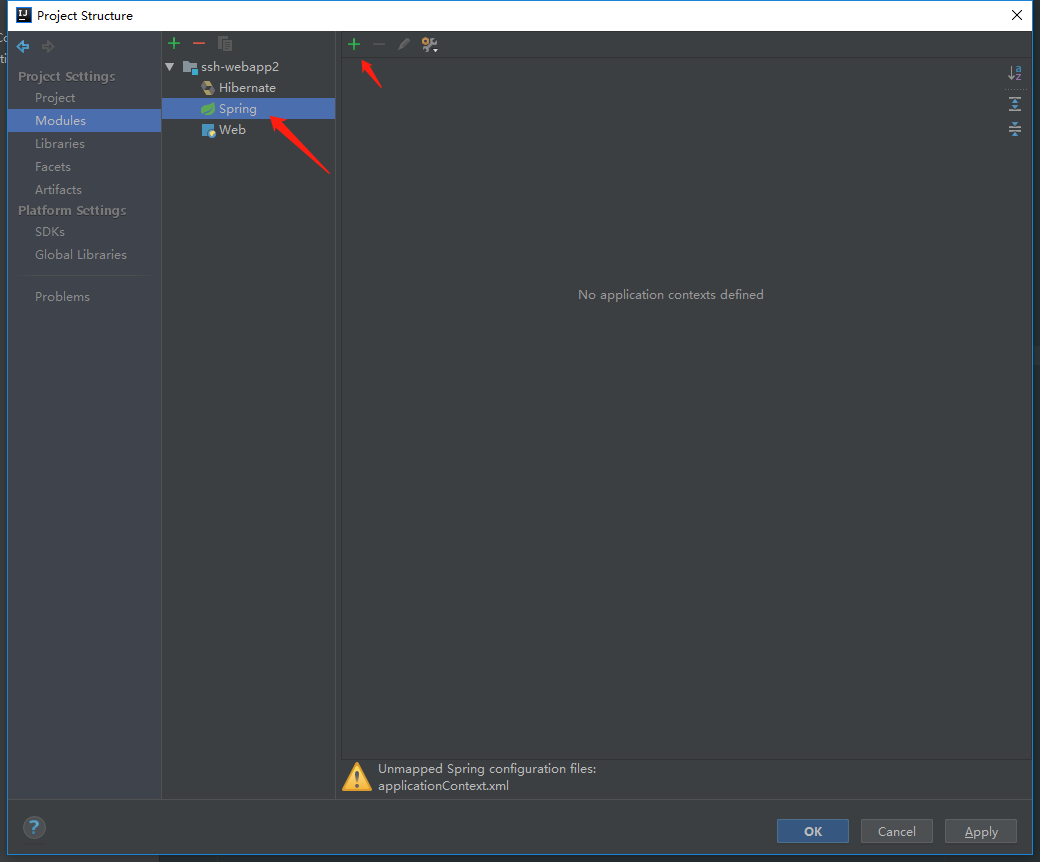
21.在弹出Project Structure,在Modules中,选择Spring,点击+号的按钮,如下图:

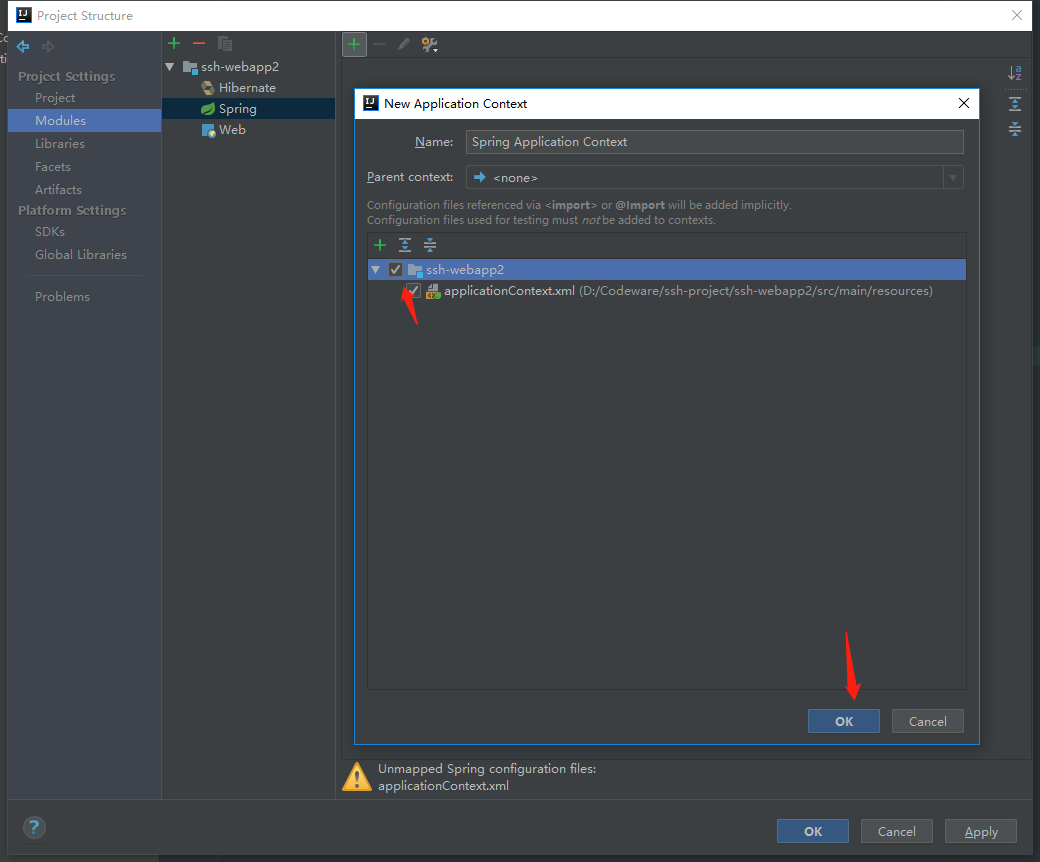
22.勾选applicationContext.xml文件,如下图:

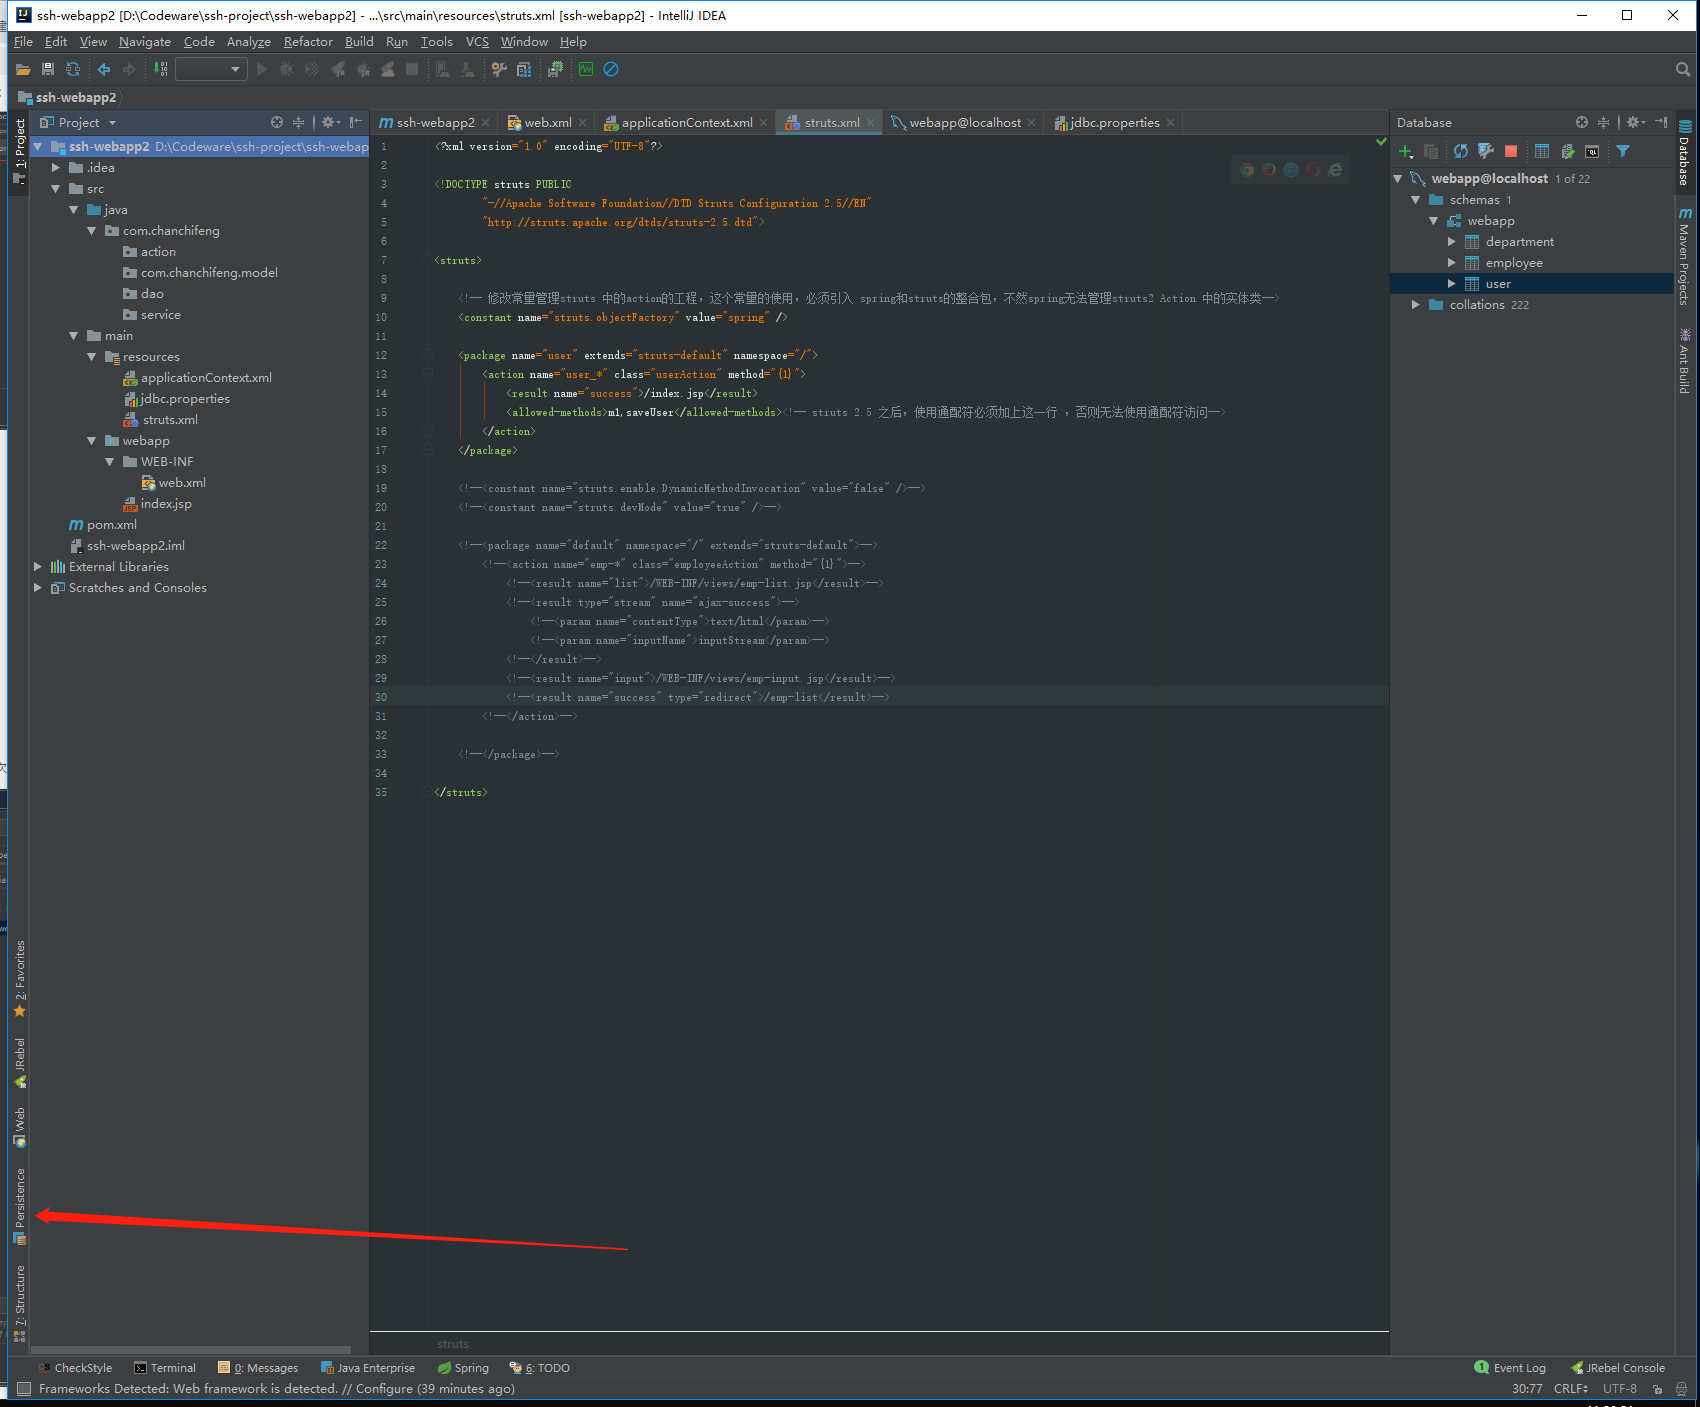
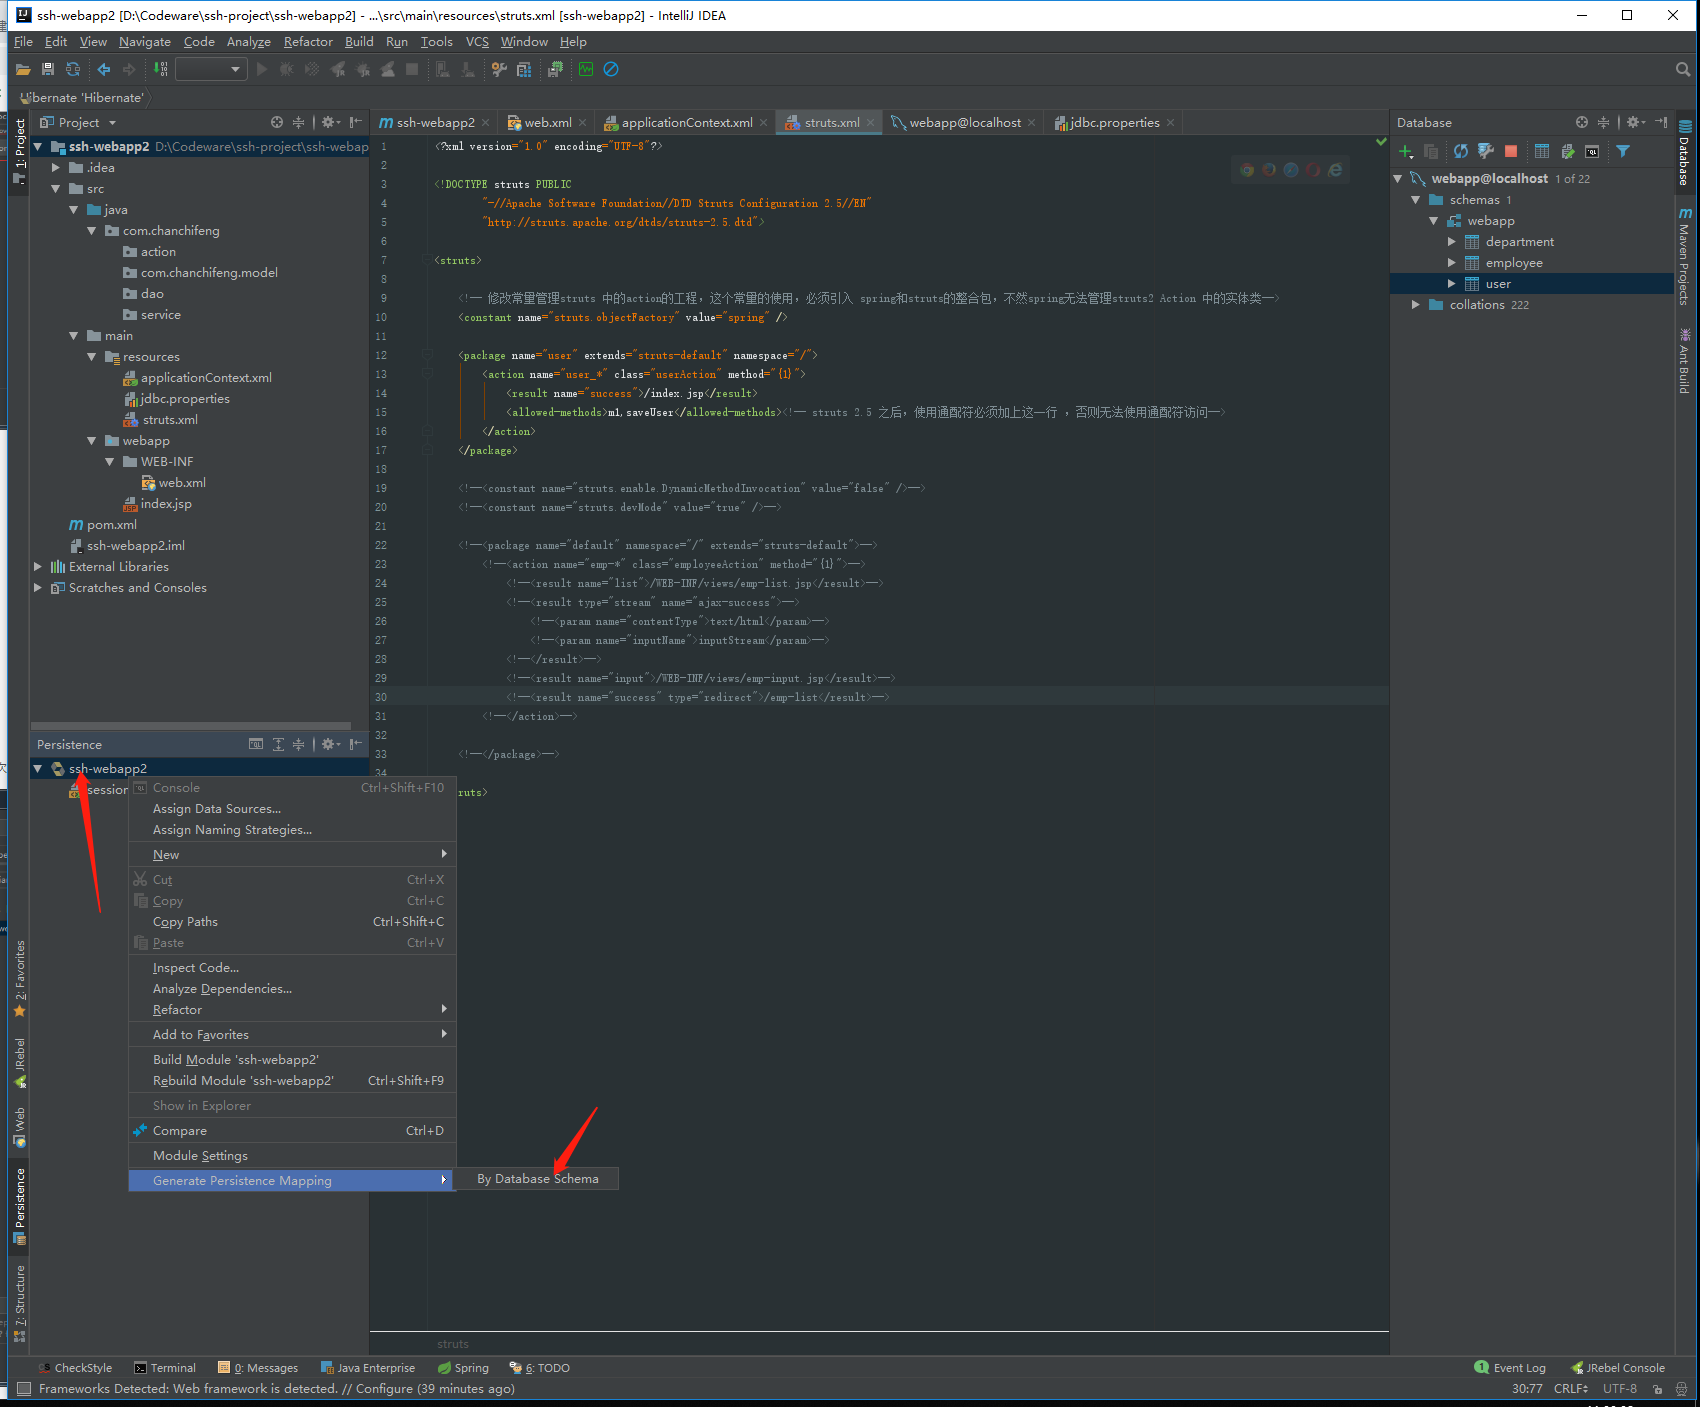
23.点击idea左侧的Persistence,如下图:

24.选中ssh webapp2,右击,选择Generate Persistence Mapping 的By Database Schema,如下图:

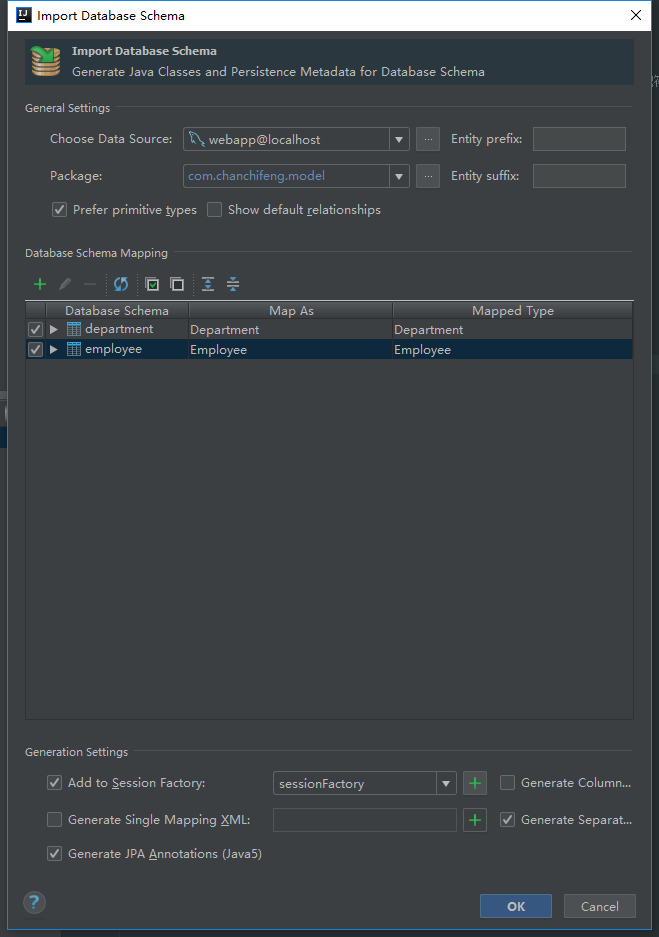
25.配置Hibernate对应model的信息,如下图:
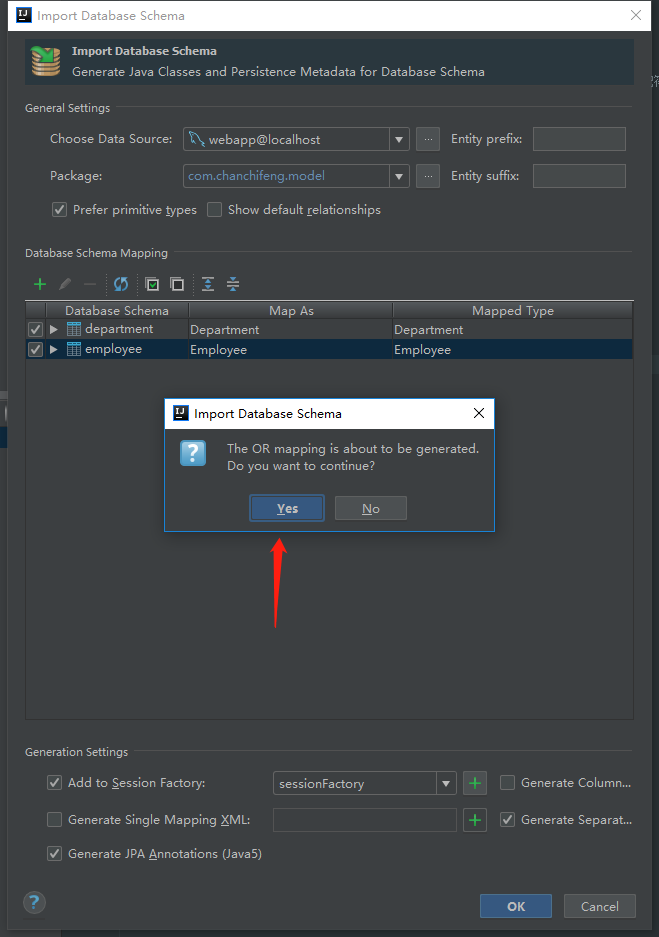
26.点击确认,如下图:

27.生成完毕,可以见如下图,出现hibernate映射的model和applicationContext.xml多了property的配置,如下图:
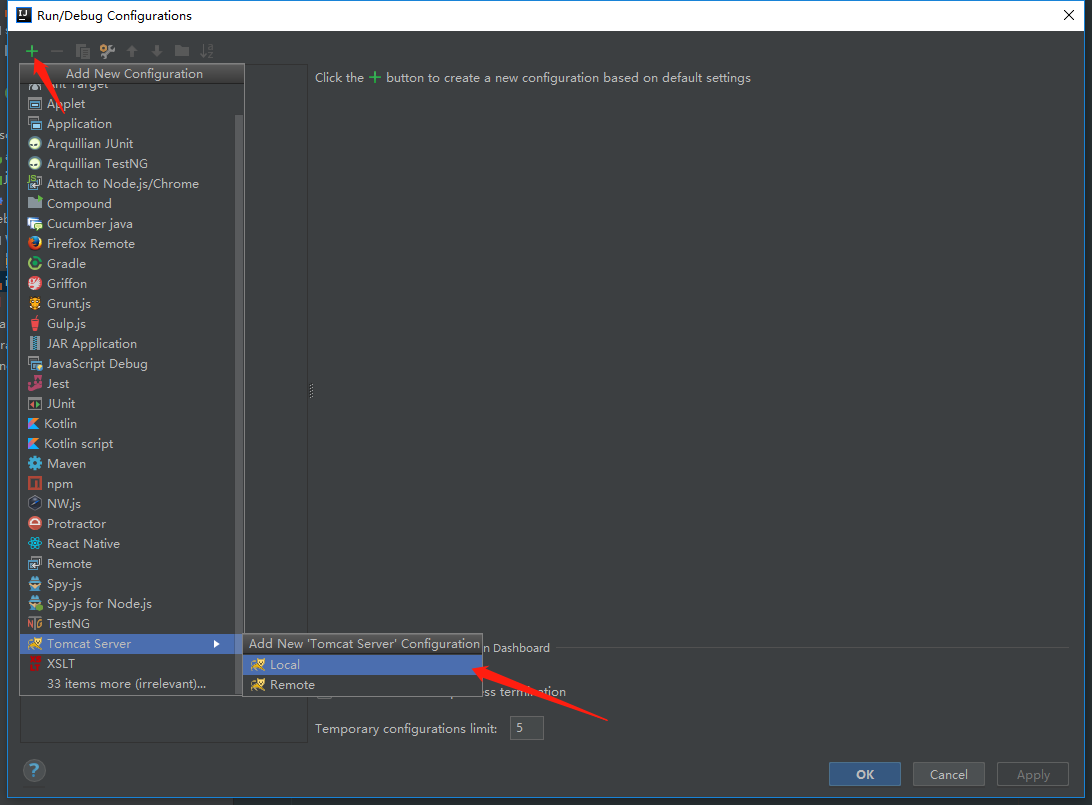
28.配置Tomcat,如下图:

29.点击+号,选择Tomcat Server ,选择Local,如下图:

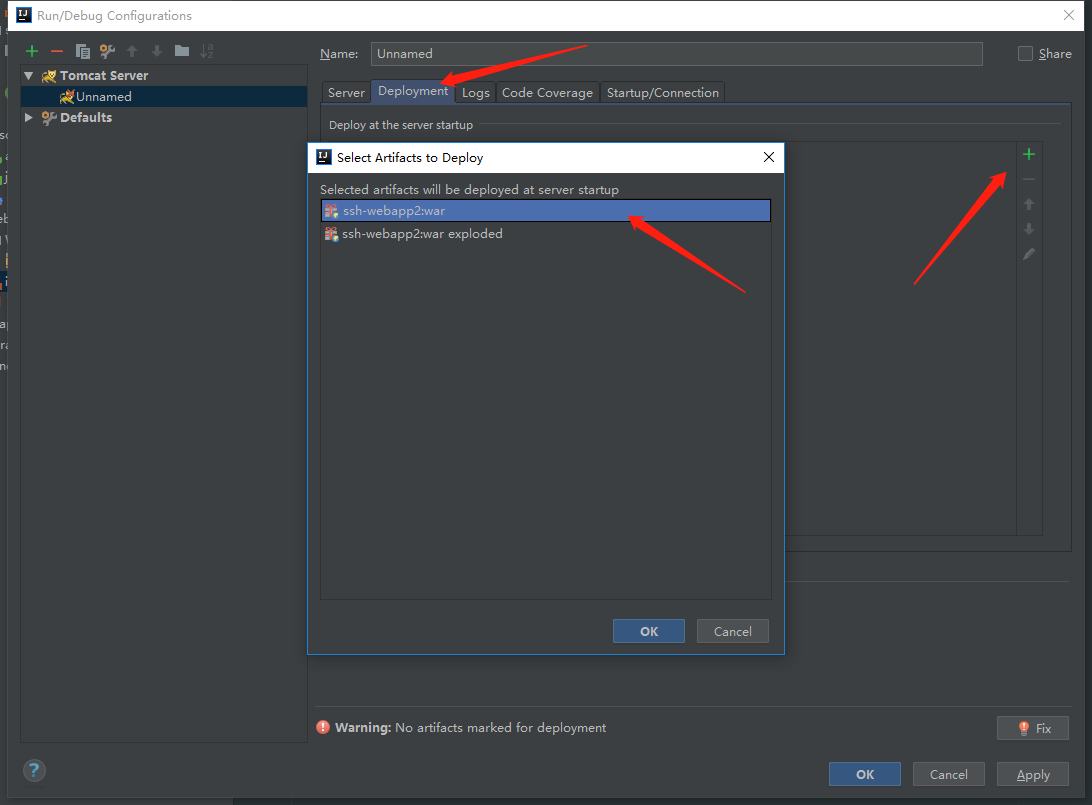
30.在Deployment中点击+号,选择ssh-webapp2:war,如下图:

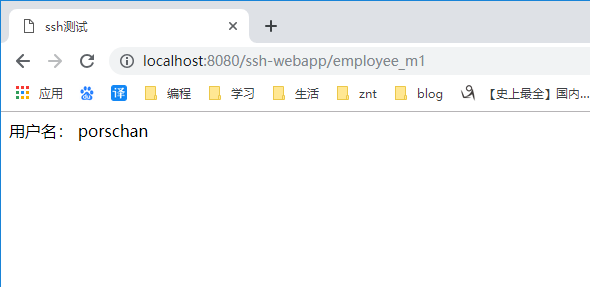
31.运行项目,在浏览器中输入:http://localhost:8080/ssh-webapp/employee_m1,如下图: