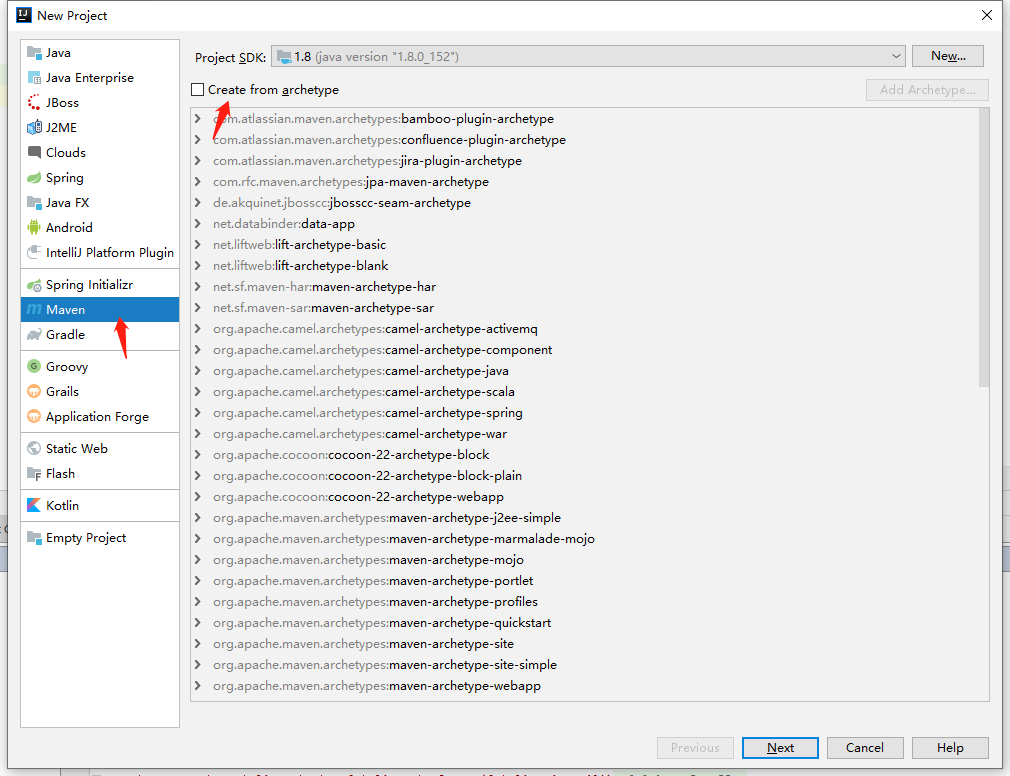
1.新建一个空项目,这里使用Maven创建一个空的Maven项目。
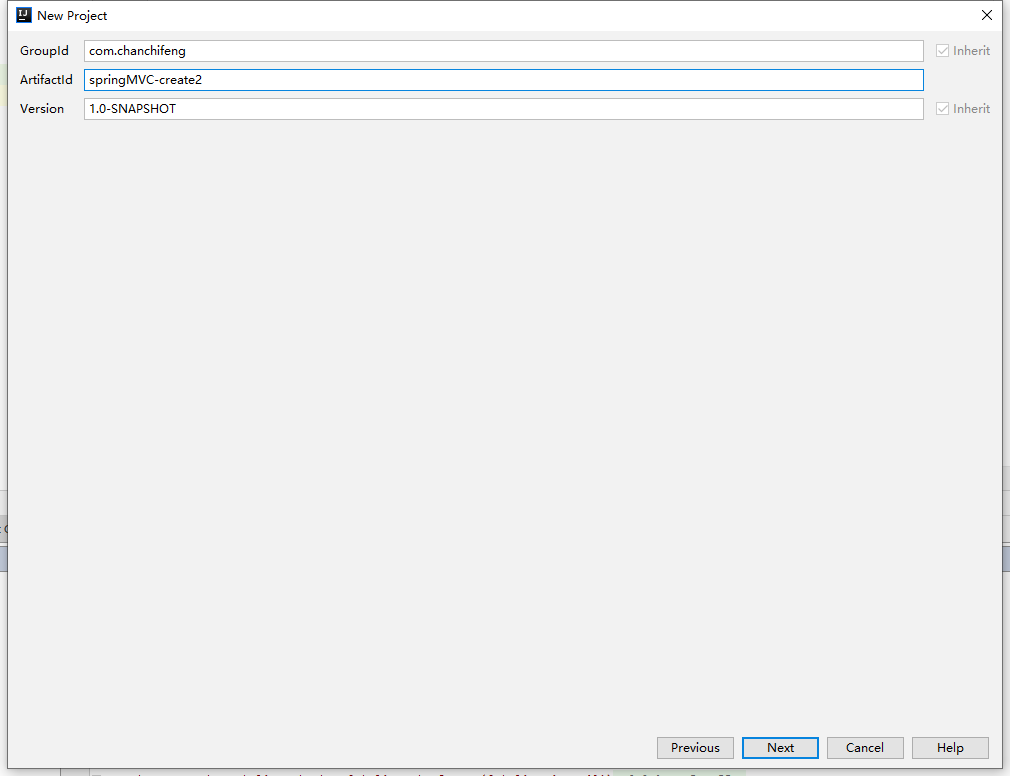
2.填写GroupId和ArtifactId。
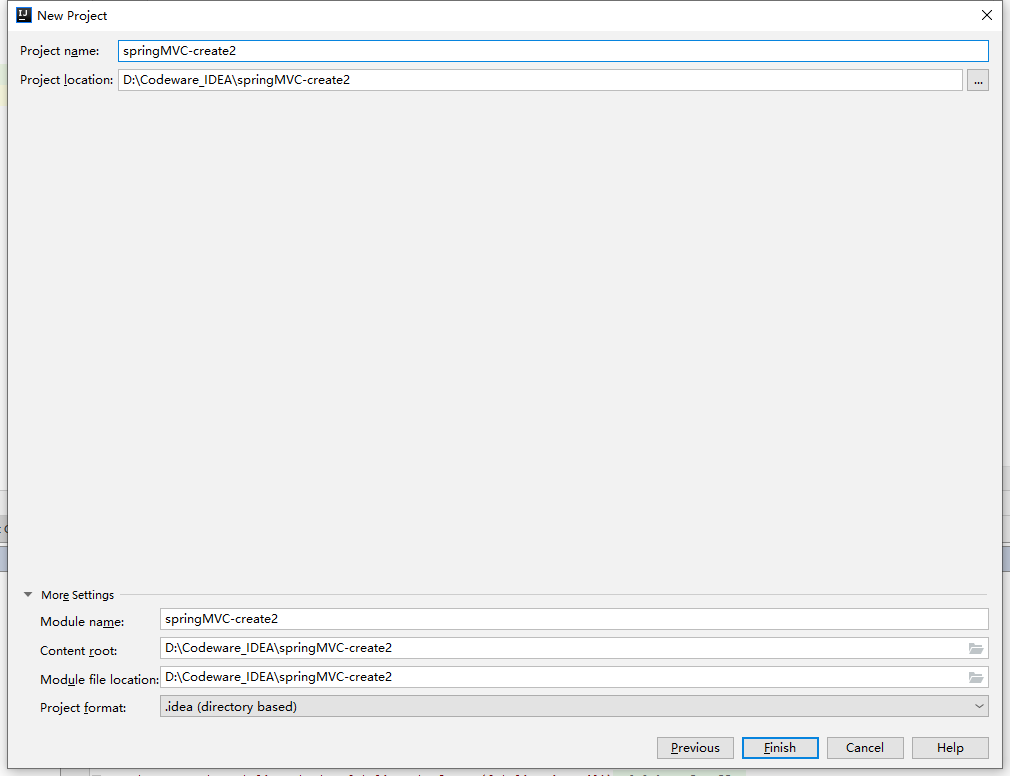
3.填写Project name。
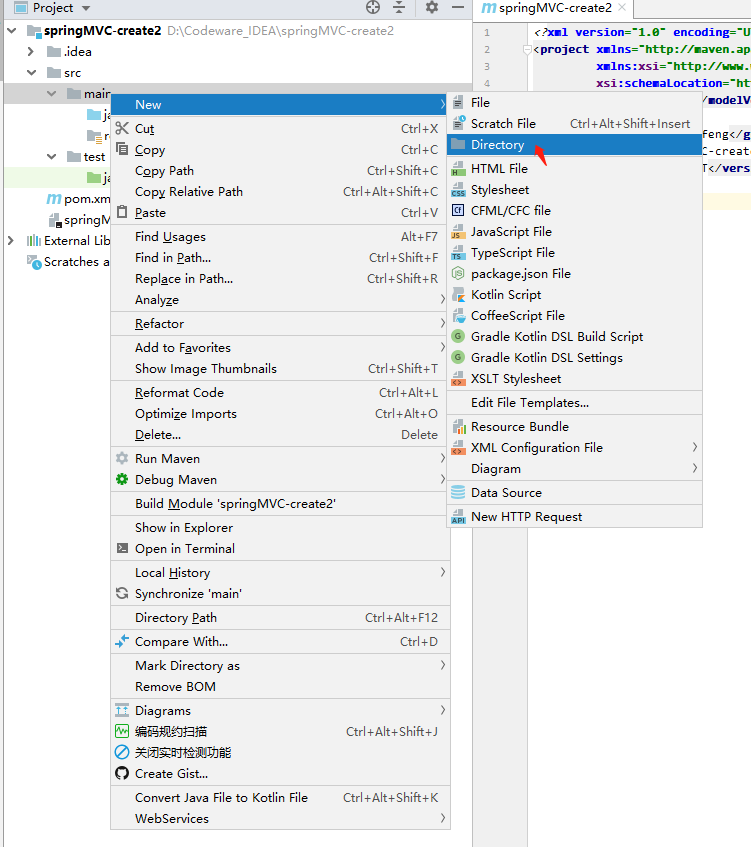
4.创建一个目录,名叫webapp。
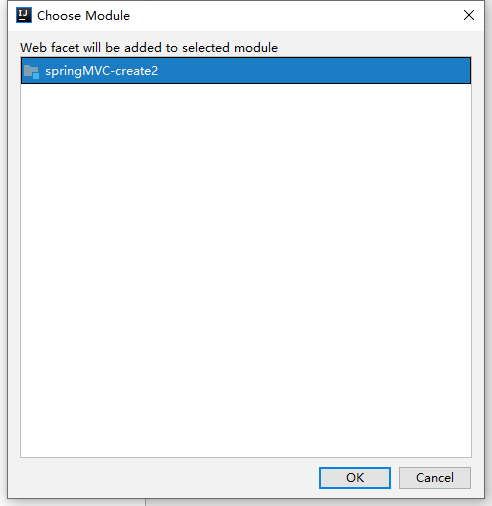
5.在项目结构下设置web,先添加web。

6.选中springMVC-create2。
7.在Web Resource Directories中选择第一行,修改为对应的web项目路径。
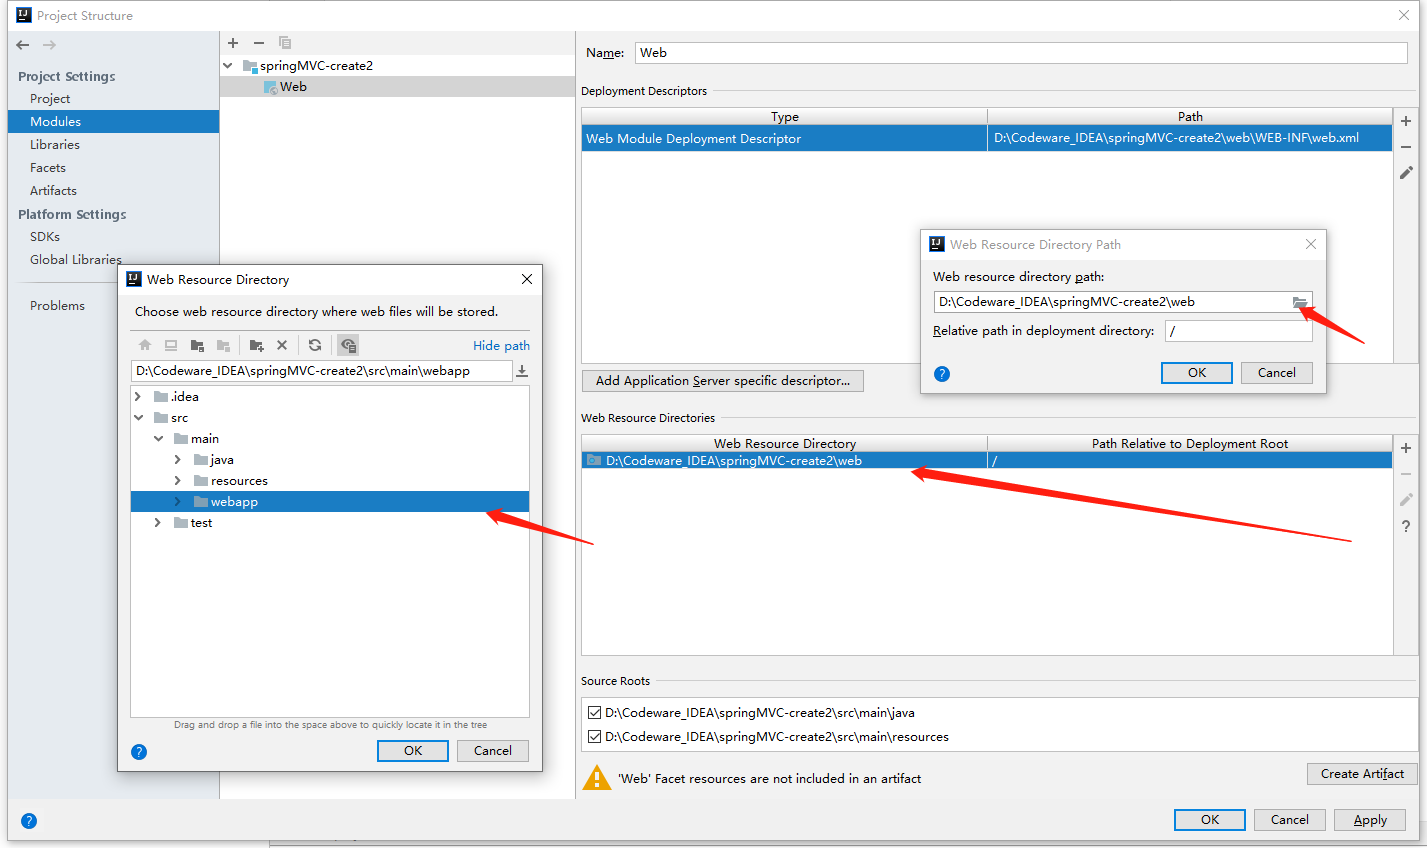
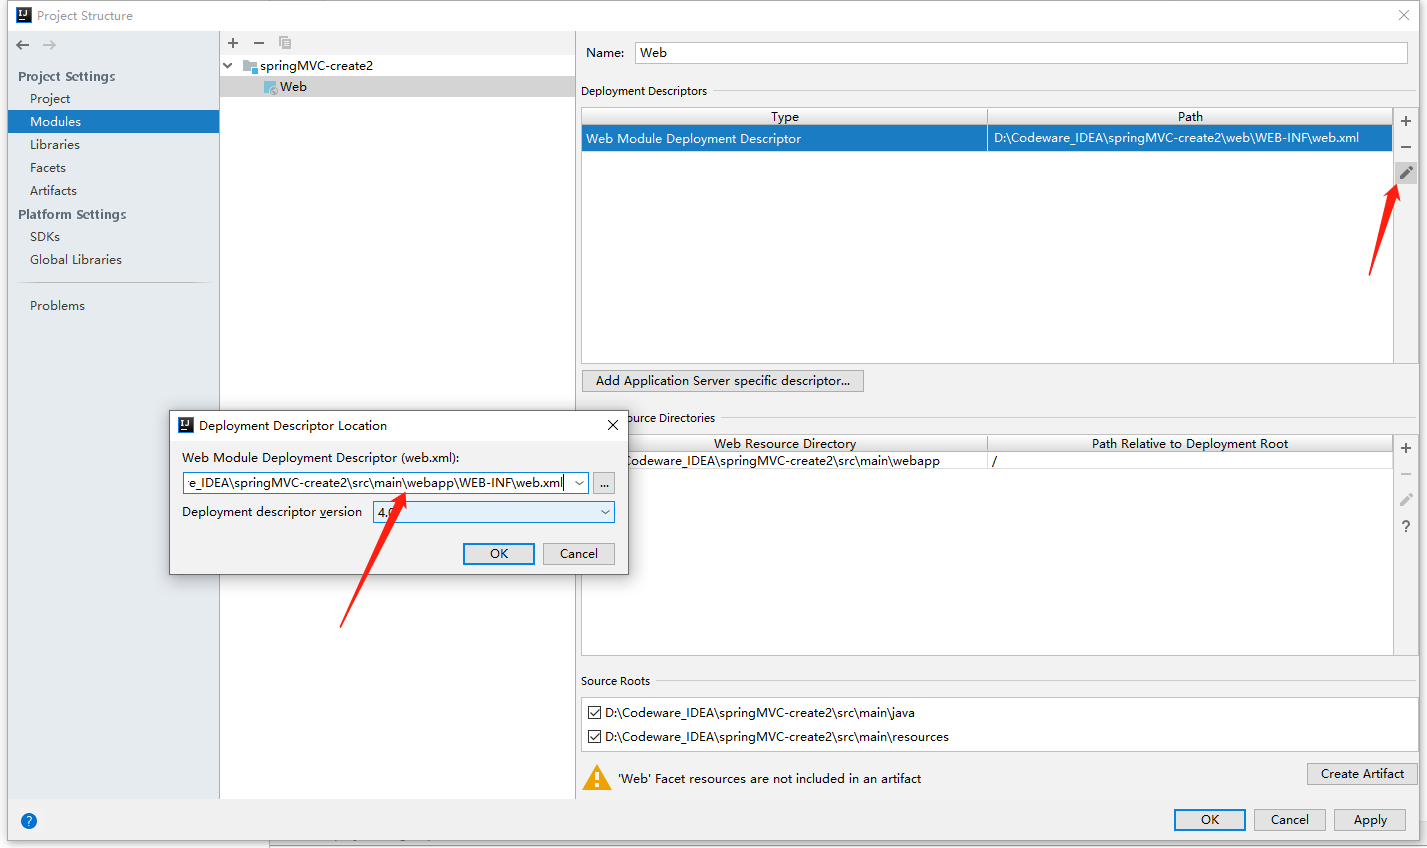
8.同理,在Deployment Descriptors中,修改web.xml的路径。
9.此时,就能看到webapp下,自动生成WEB-INF,自动生成WEB-INF的web.xml。
10.在src/main/java中创建com.chanchifeng.controller包,在该包下创建ItemsController的Java文件,代码如下:
1 | @Controller |
11.在src/main/resources下创建applicationContext.xml和dispatcher-servlet.xml。
11.1.applicationContext.xml代码如下:
1 | <?xml version="1.0" encoding="UTF-8"?> |
11.2.dispatcher-servlet.xml代码如下:
1 | <?xml version="1.0" encoding="UTF-8"?> |
12.在src/webapp/WEB-INF中创建jsp文件夹,在该文件夹下再创建items的文件夹,在items文件夹里创建itemsList.jsp,代码如下:
1 | <%@ page contentType="text/html;charset=UTF-8" language="java" %> |
13.在src/webapp中创建index.jsp,代码如下:
1 | <%@ page contentType="text/html;charset=UTF-8" language="java" %> |
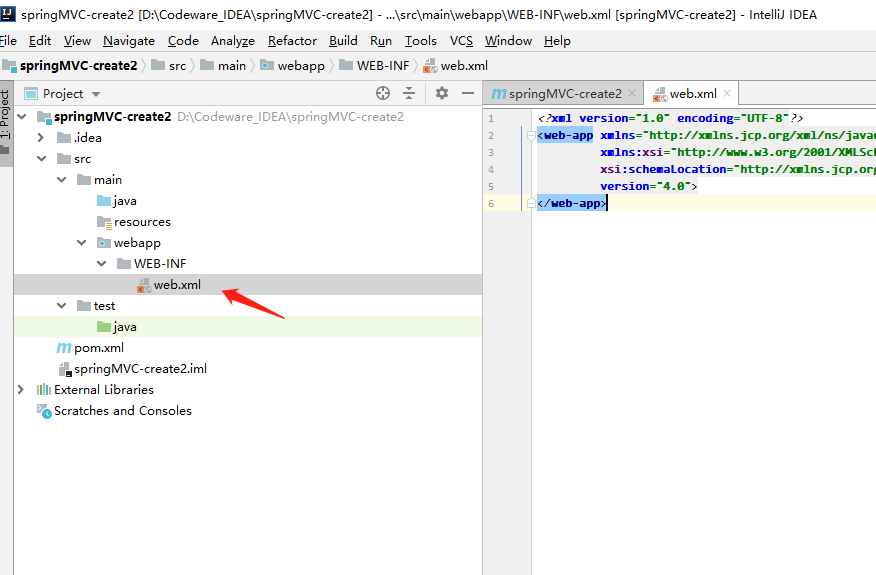
14.最后需要编写web.xml,代码如下:
1 | <?xml version="1.0" encoding="UTF-8"?> |
15.pom.xml文件代码如下:
1 | <?xml version="1.0" encoding="UTF-8"?> |
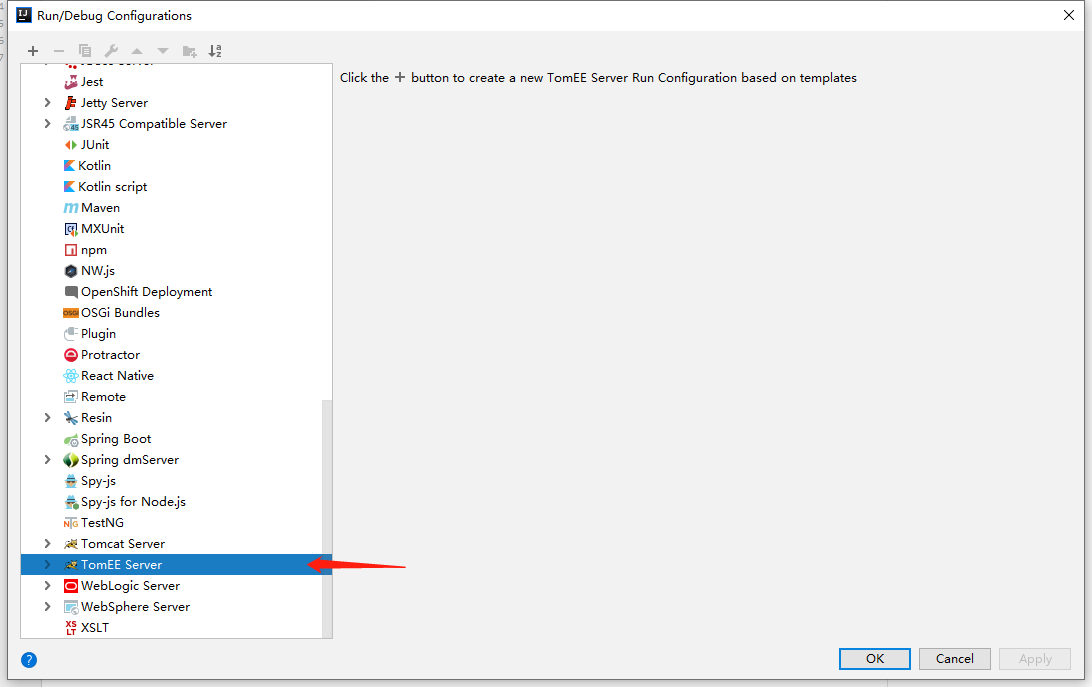
16.为项目添加Tomcat。
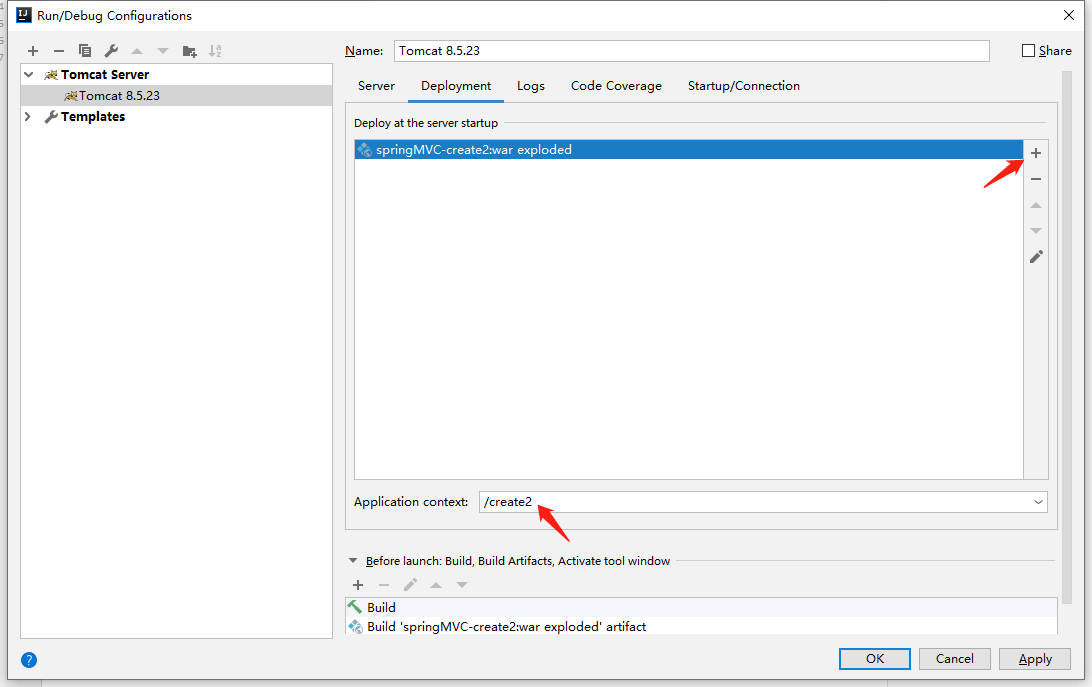
17.设置项目的Tomcat配置信息。
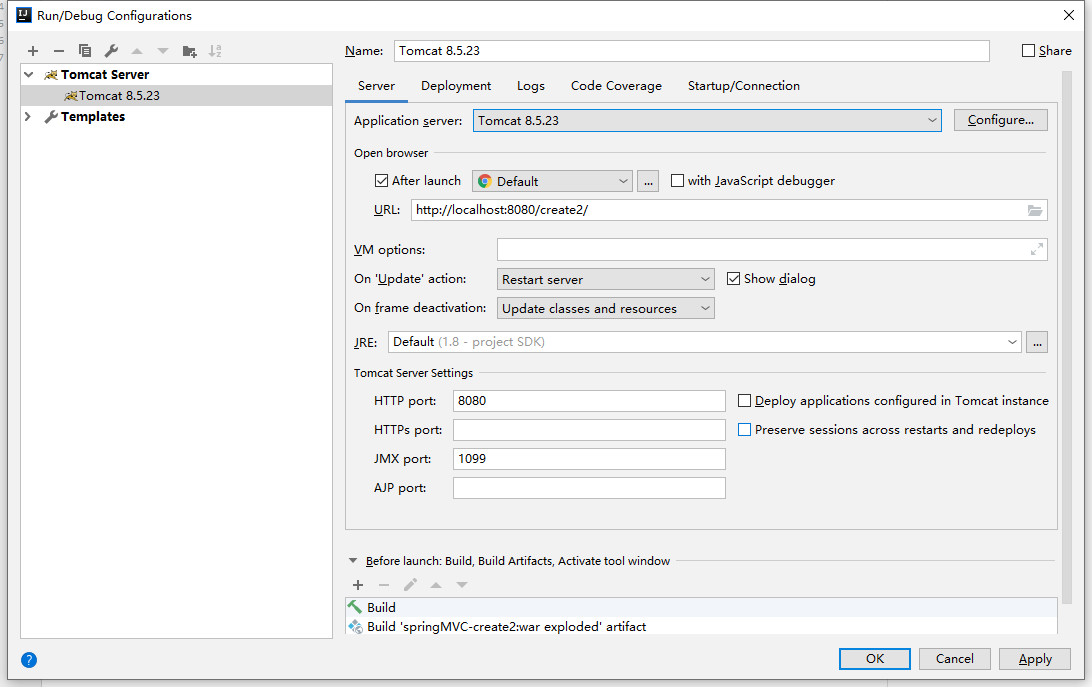
18.设置项目的Tomcat配置信息。
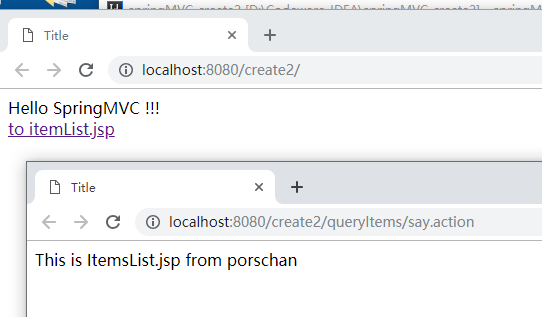
19.项目运行效果,这里就完成了springMVC的搭建了。